 |
Matronics Email Lists
Web Forum Interface to the Matronics Email Lists
|
| View previous topic :: View next topic |
| Author |
Message |
william(at)gbta.net
Guest
|
 Posted: Thu Jan 07, 2010 11:39 am Post subject: OOPS!! What have I done??? Posted: Thu Jan 07, 2010 11:39 am Post subject: OOPS!! What have I done??? |
 |
|
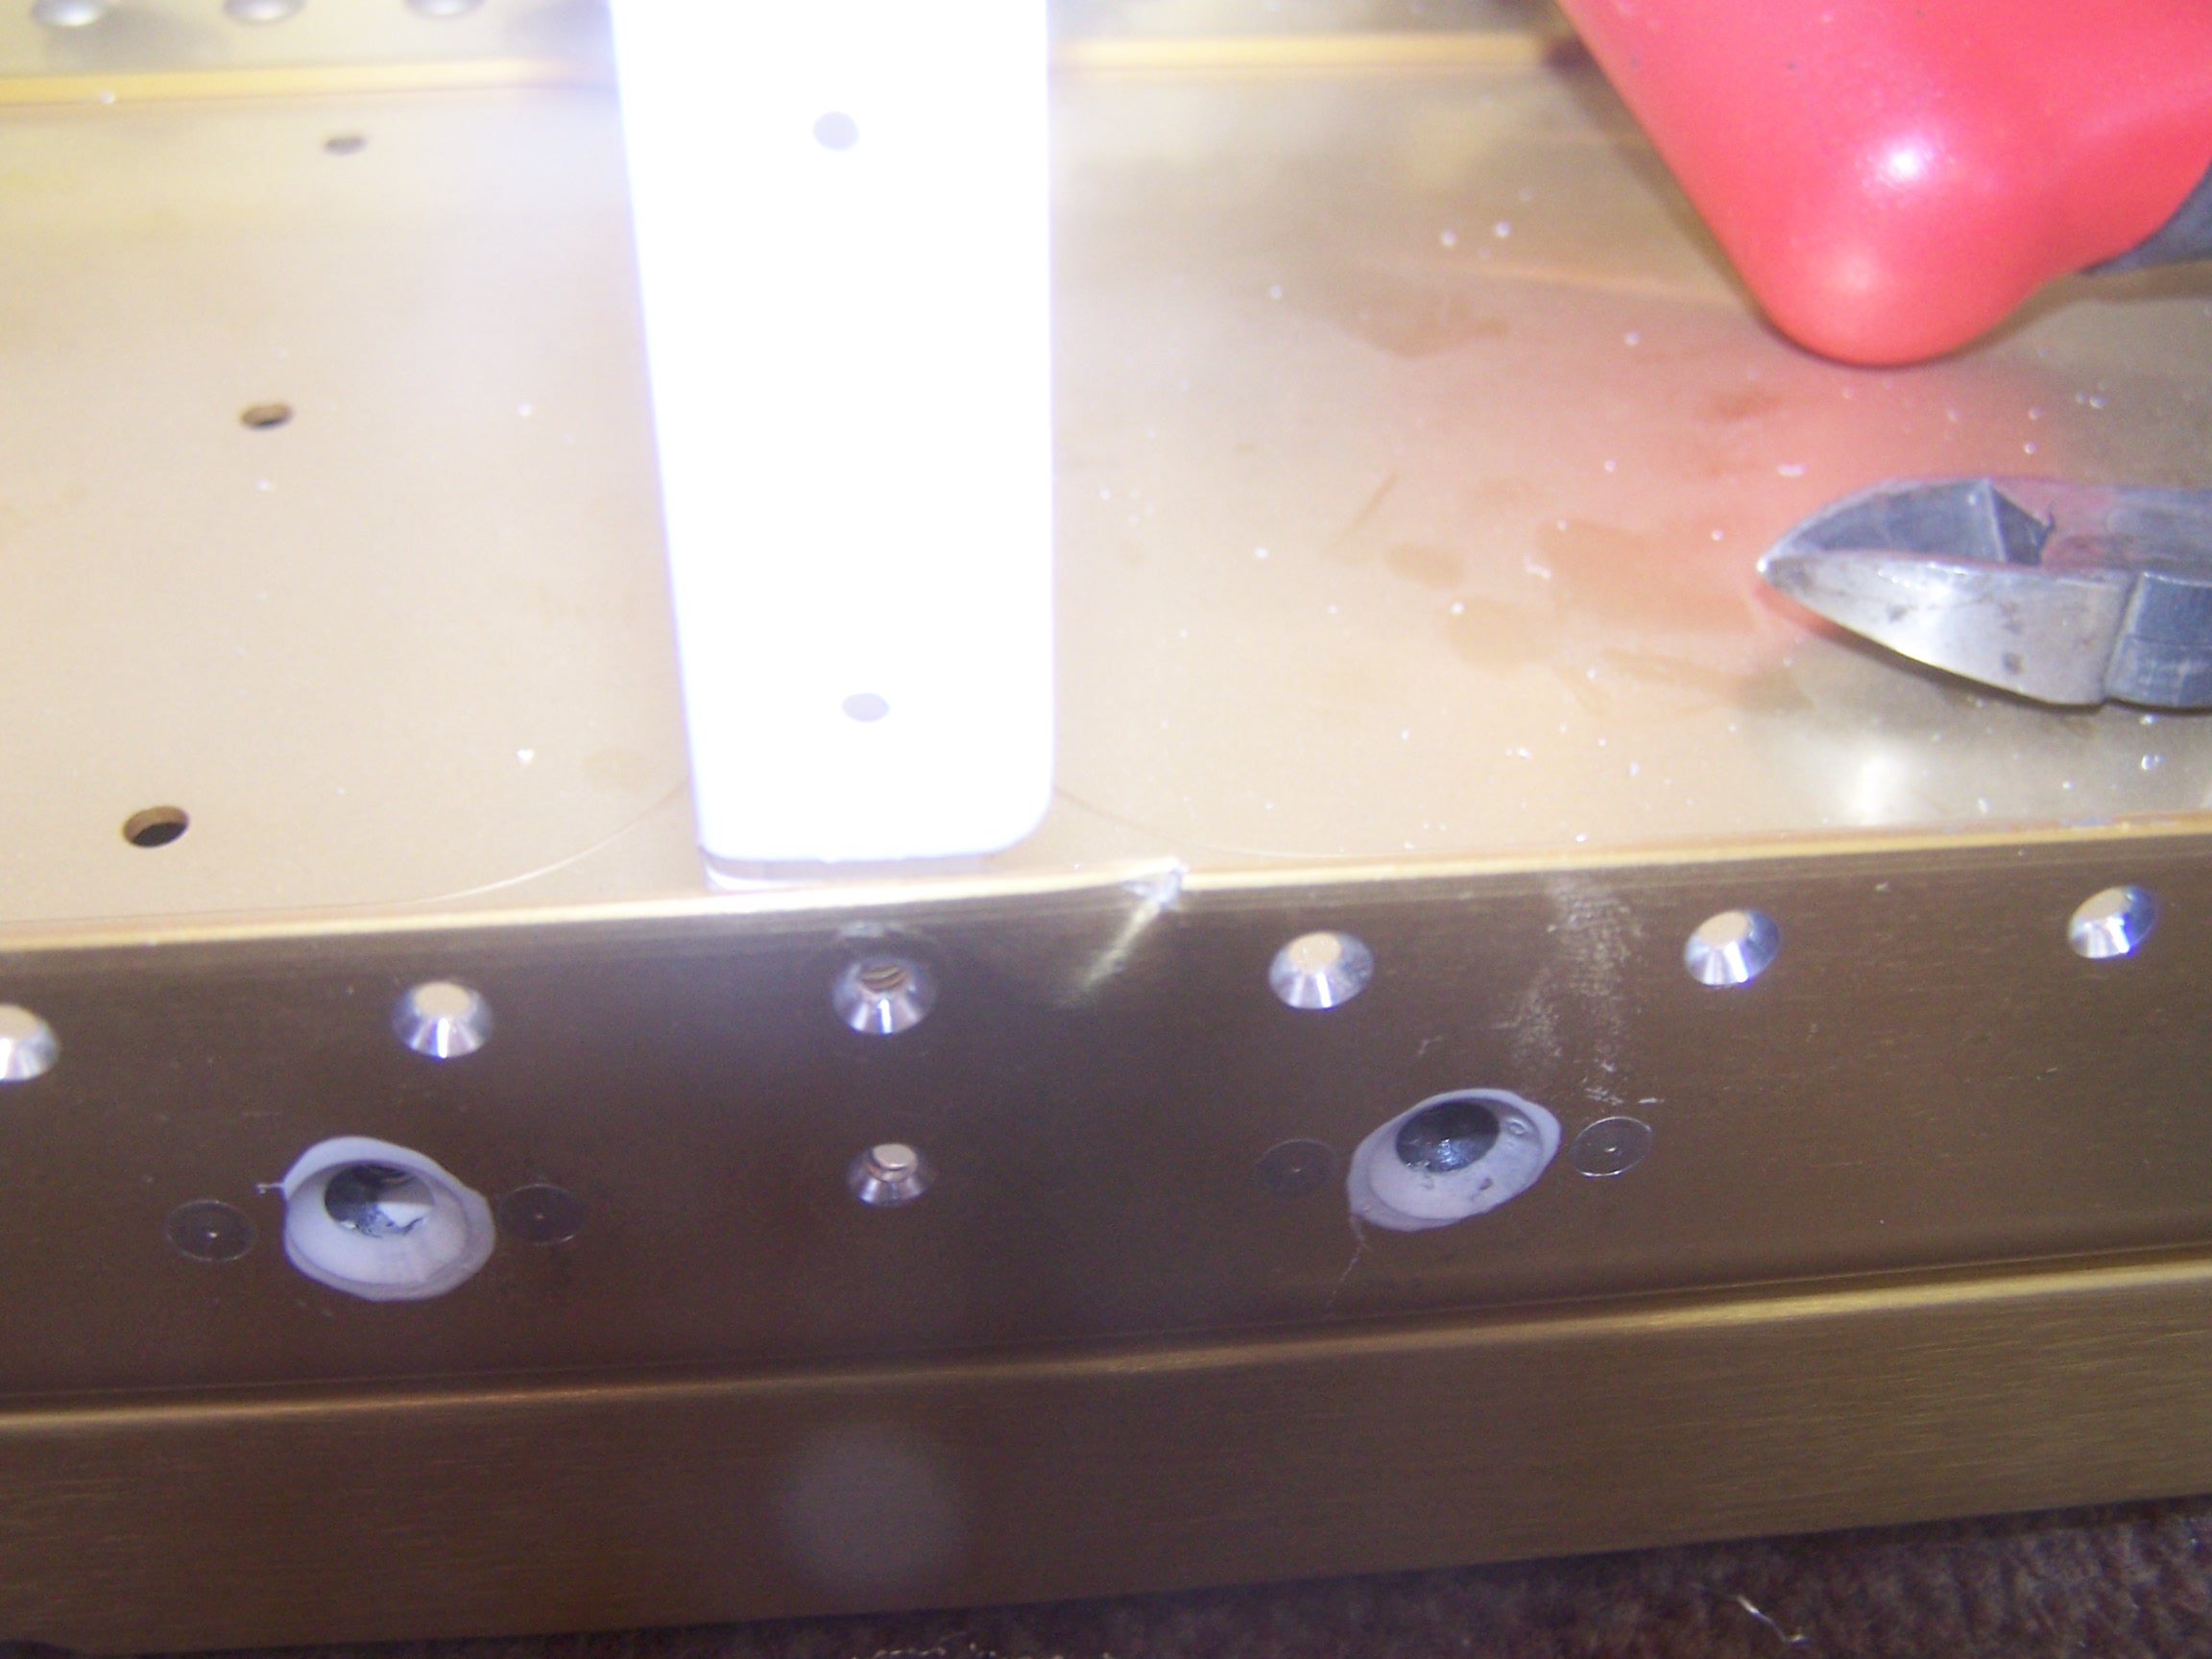
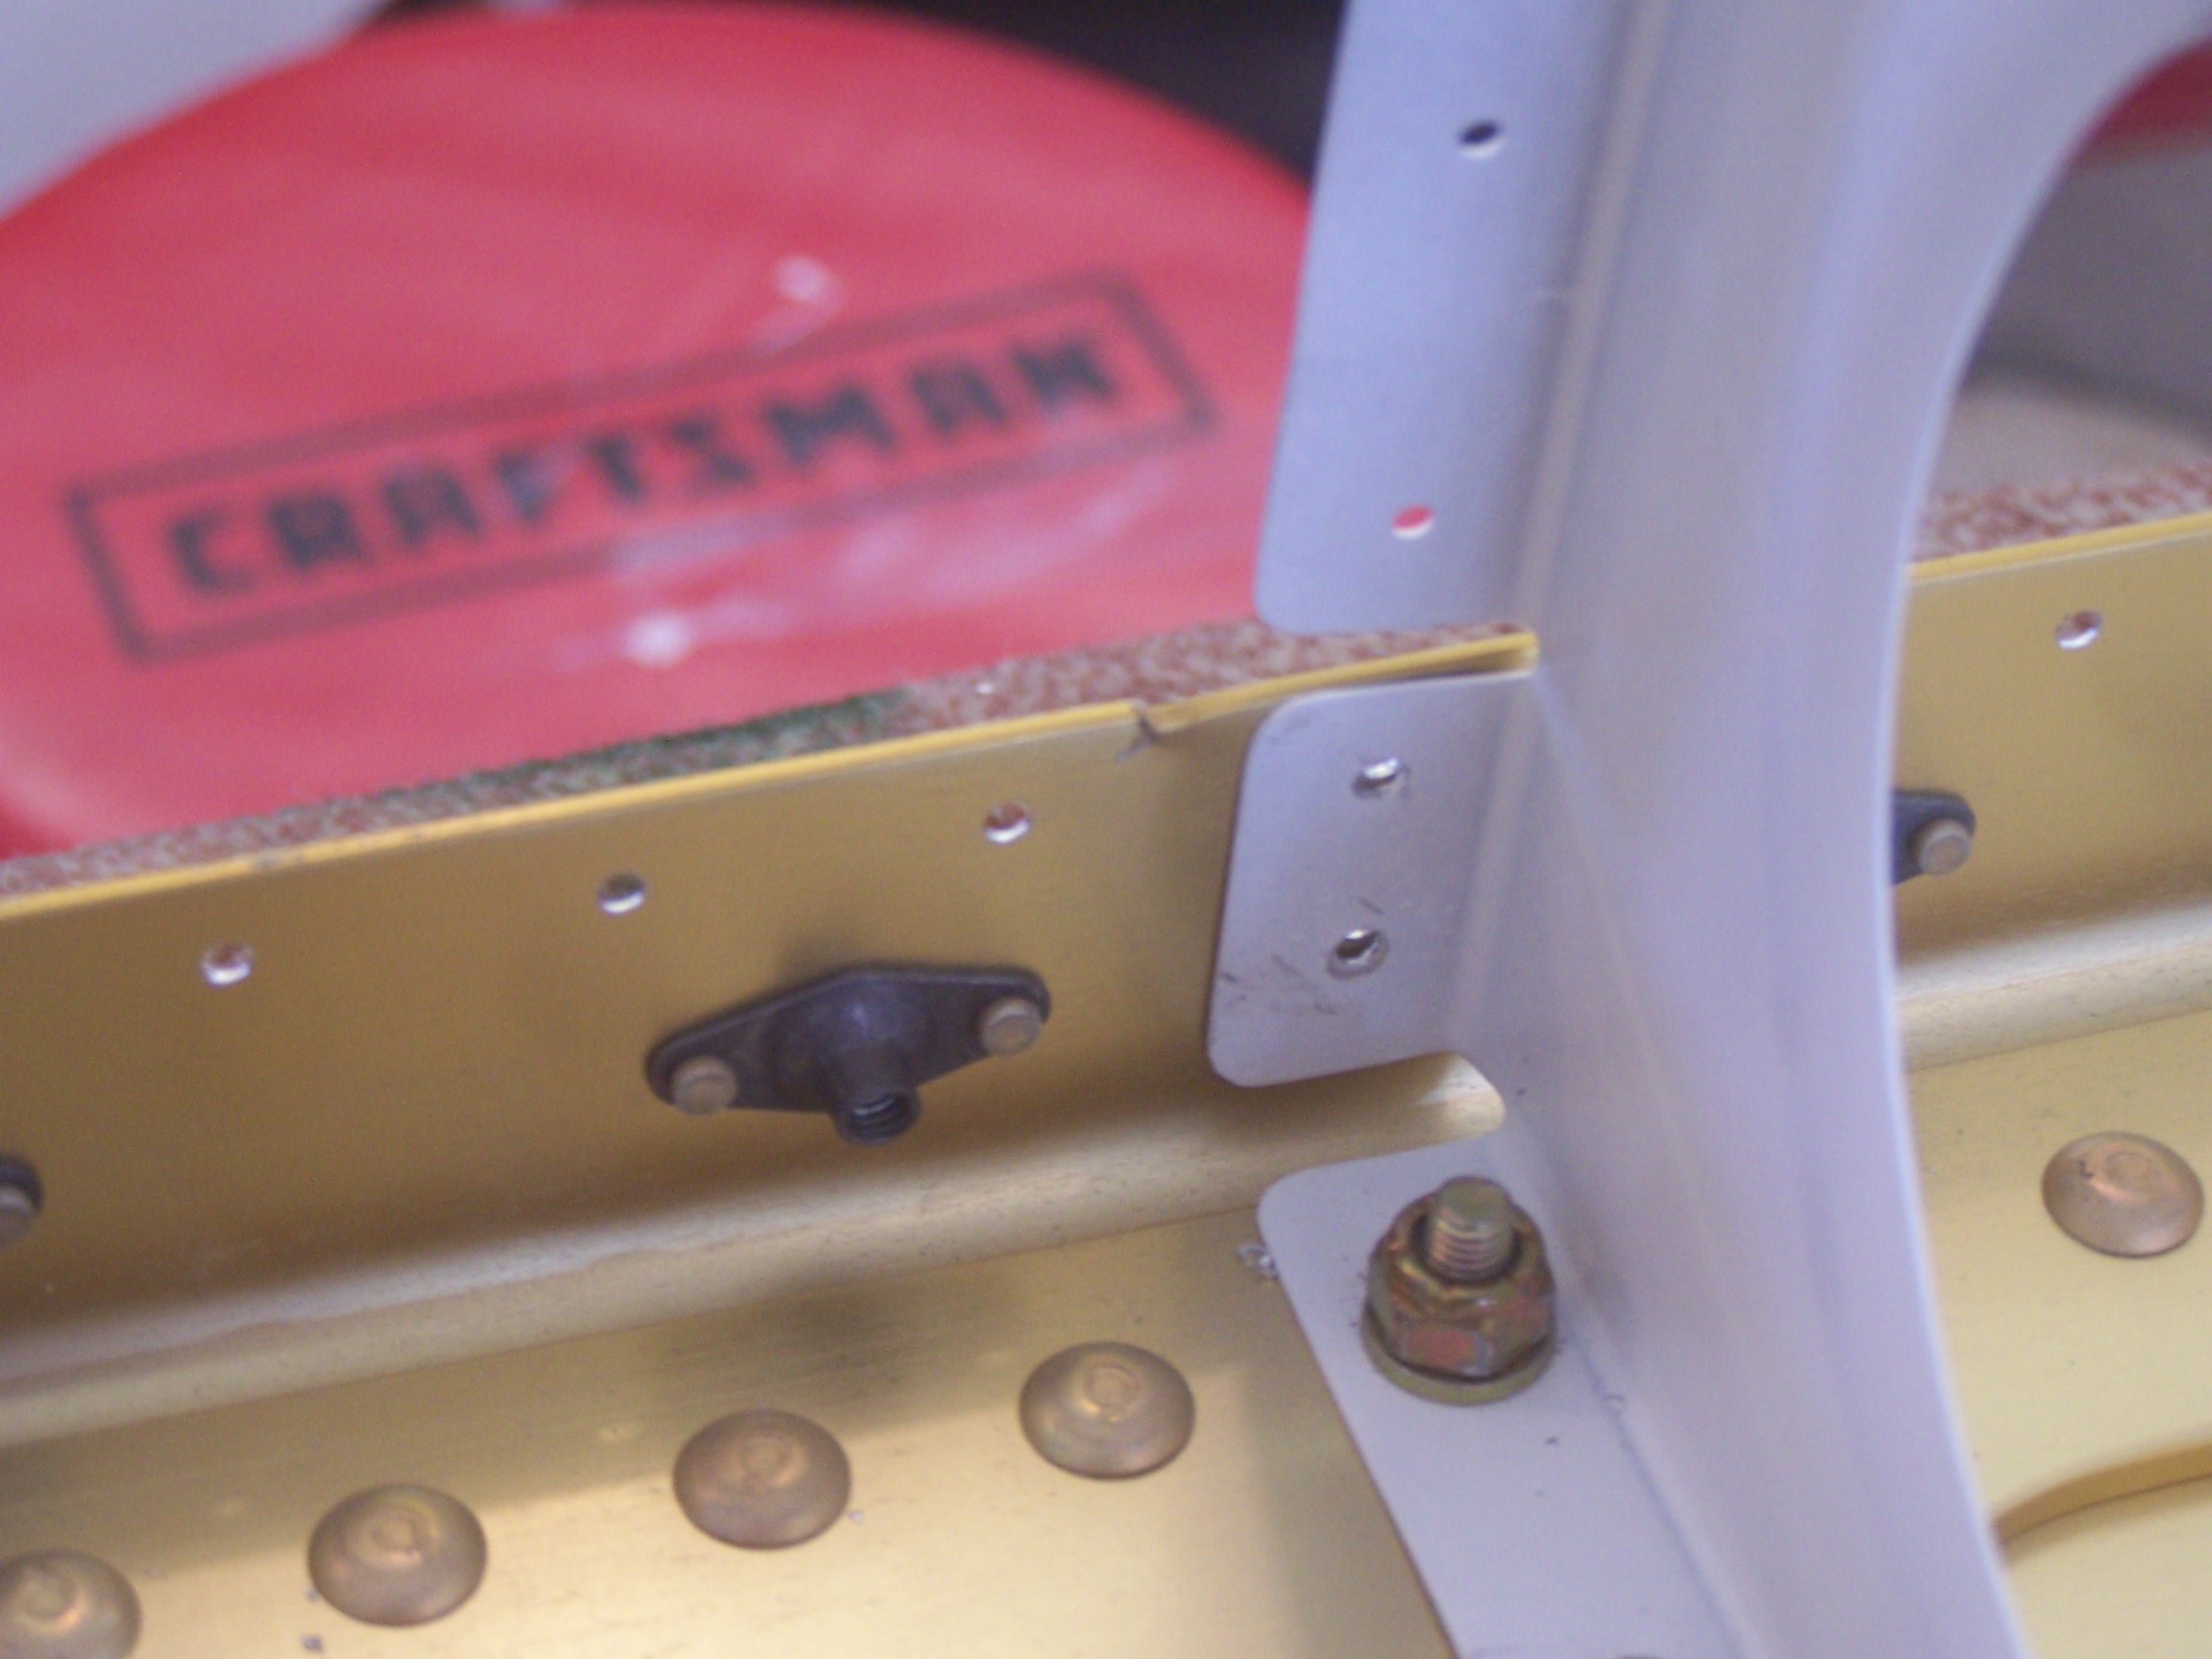
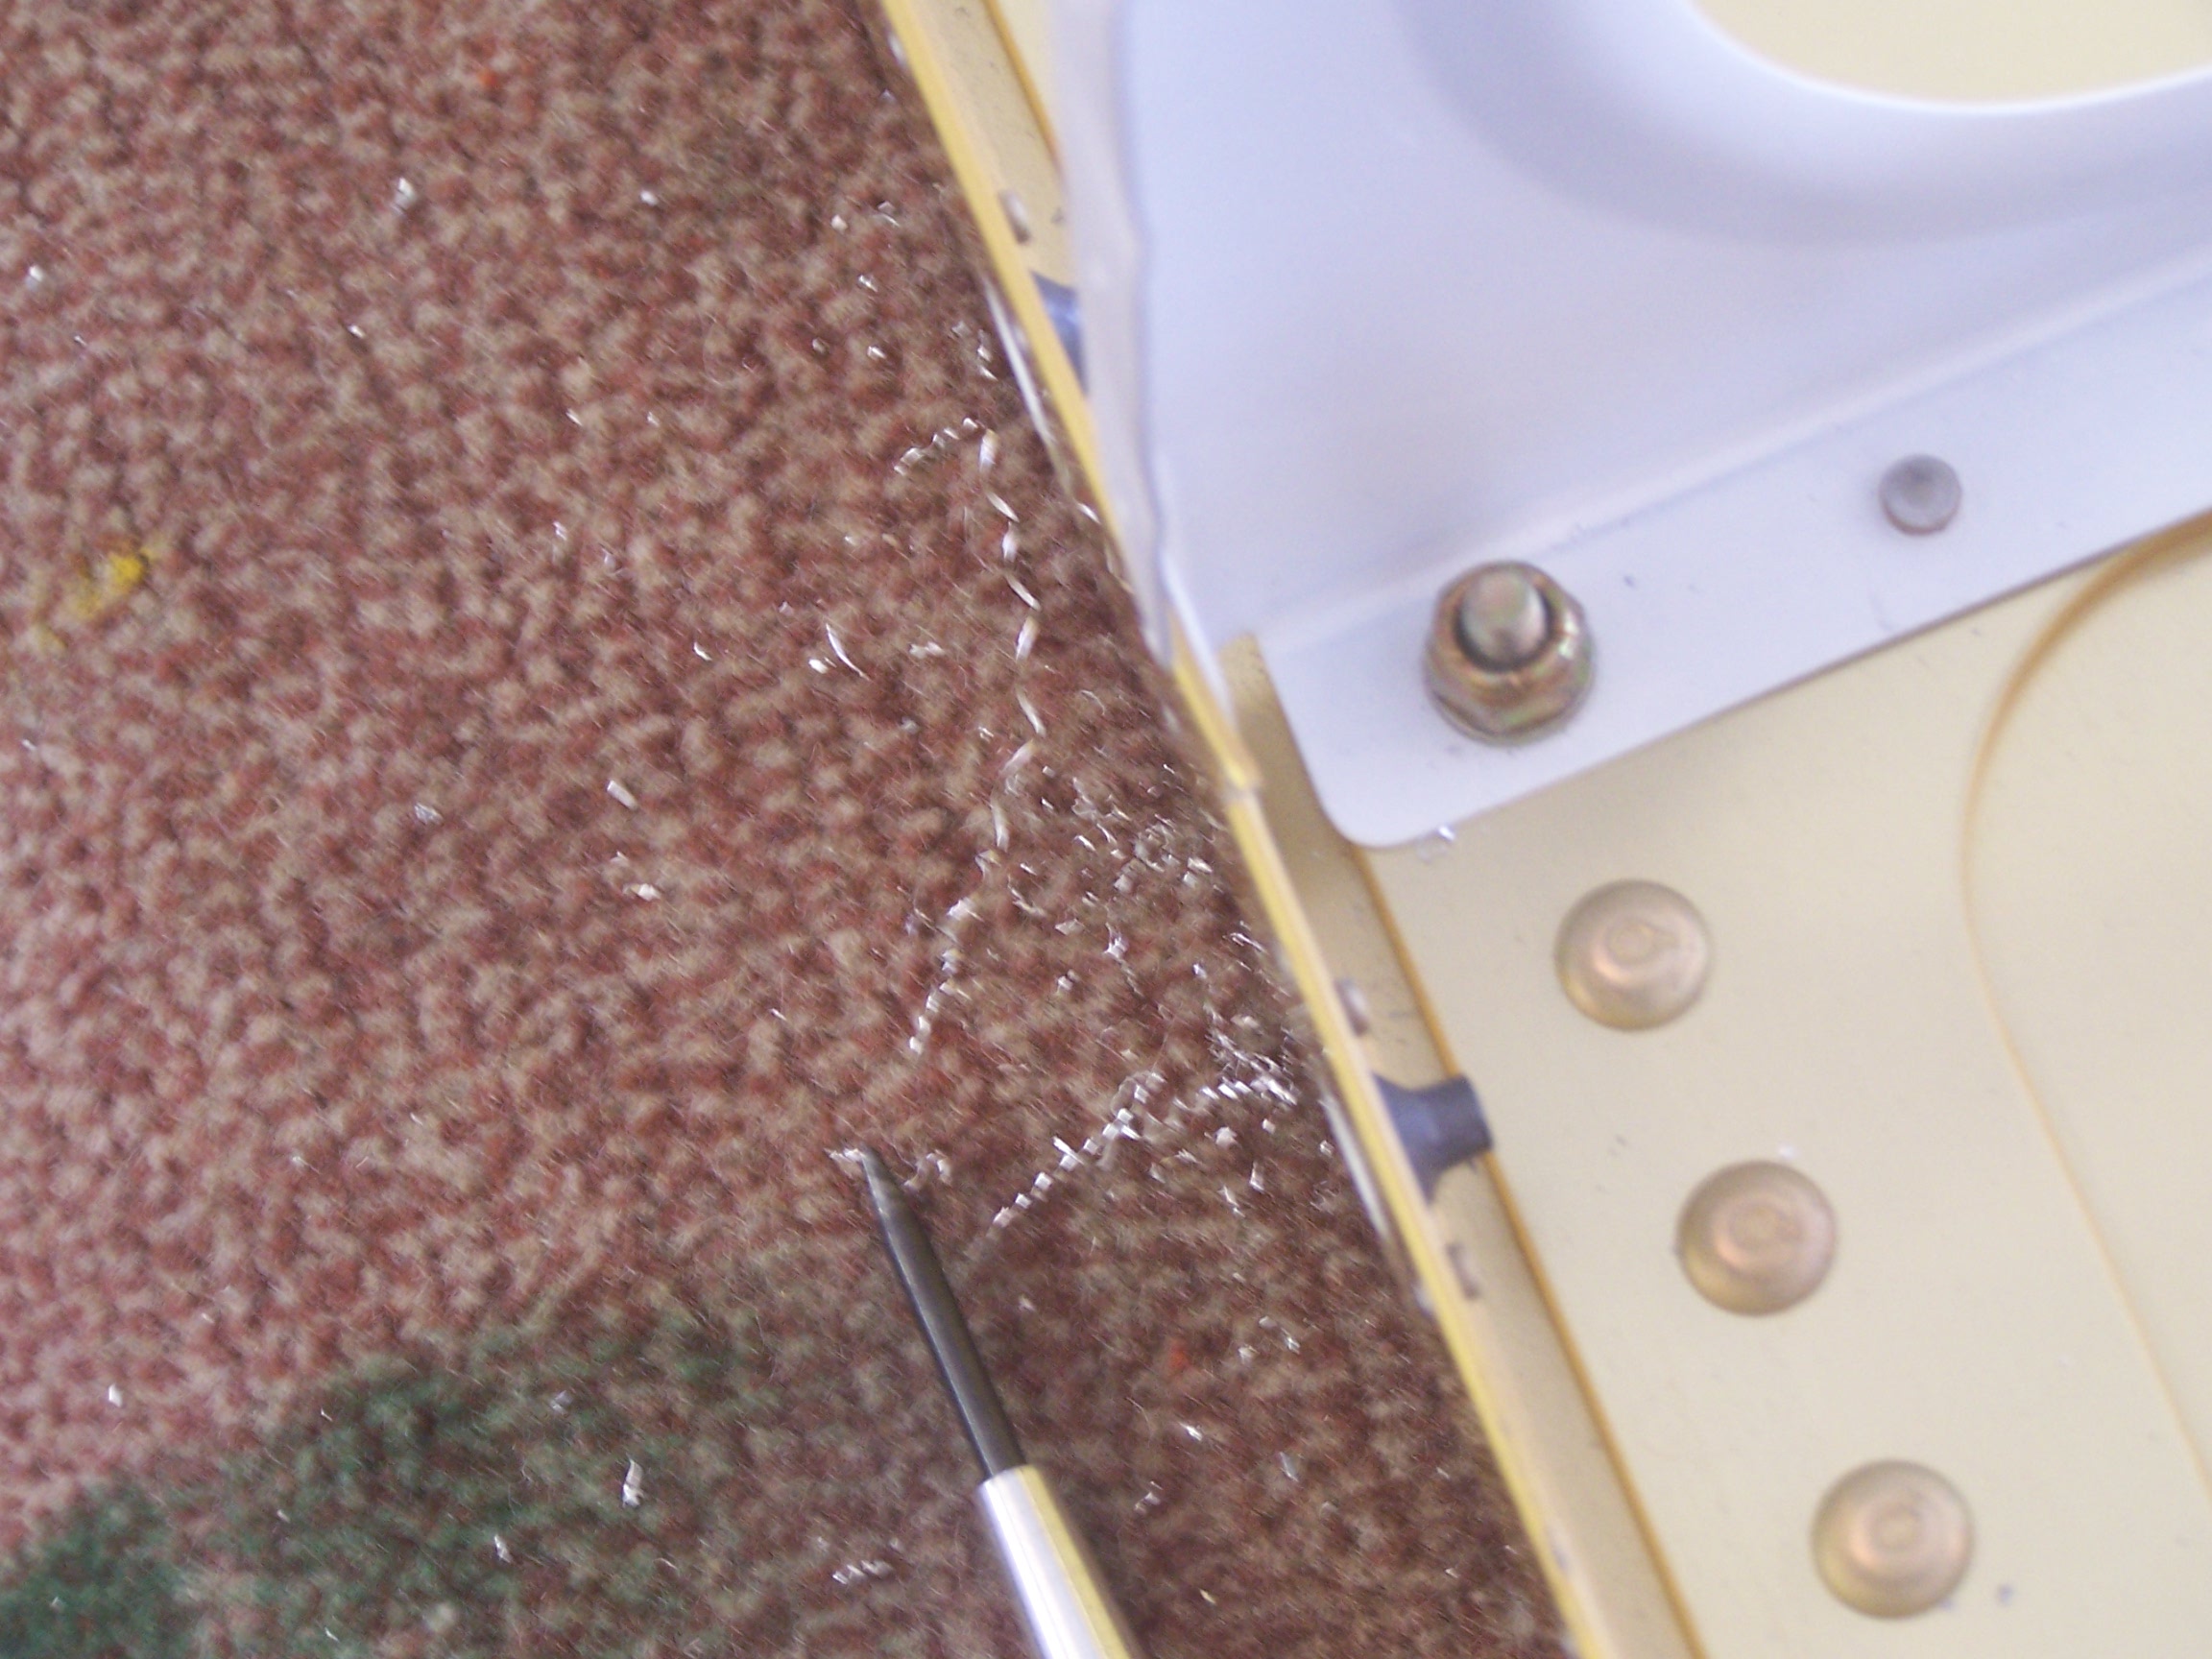
I think I might have messed up pretty good this  time.  Working on the wings on pages 14-5 or 14-6 we are to rivet the  forward most hole on the flanges of the inboard most 7 W-1011 L,R ribs.   While doing this I had a less than acceptable rivet so I drilled it out.   When removing the shop head (via punch/small mallet) I managed to push the rib  flange away from the spar flange a little.  So, this is where I hopefully  learn my lesson, I tape the jaws of a pliers up to prevent scratching the  spar/rib.  I easily squeeze the pliers on the flange and it nicely pulls it  back into place.  However, I realize when I 'm done that the "cutters" on  the pliers nipped the edge of the spar flange.  Left a nice little "cut" on  the edge of the spar flange (top flange--didn't count exactly where it was but  outboard about 6 or 7 ribs from the inboard most rib).  Lesson here--don't  use pliers on aluminum--I know now.  Question--pics are attached--before I  contact Vans does anybody have any suggestions/advice.  Did I ruin the wing  spar??  Do I leave it alone?  Do I file it smooth and leave it?   Do I use a scotchbrite wheel and remove a smooth "notch" section to get rid of  it?  The "nip" is somewhere between 1/16 and 1/8 inch long.


 Any suggestions appreciated other than telling me  how stupid I am for doing it.  I have learned my lesson.


 Thanks in advance,

 Bill
| | - The Matronics RV10-List Email Forum - | | | Use the List Feature Navigator to browse the many List utilities available such as the Email Subscriptions page, Archive Search & Download, 7-Day Browse, Chat, FAQ, Photoshare, and much more:
http://www.matronics.com/Navigator?RV10-List |
|
| Description: |
|
| Filesize: |
400.68 KB |
| Viewed: |
5941 Time(s) |
|
| Description: |
|
| Filesize: |
444.57 KB |
| Viewed: |
5941 Time(s) |
|
| Description: |
|
| Filesize: |
632.71 KB |
| Viewed: |
5941 Time(s) |
|
|
|
| Back to top |
|
 |
Strasnuts
Joined: 10 Feb 2009
Posts: 502
Location: Salt Lake City, UT
|
| Posted: Thu Jan 07, 2010 11:52 am Post subject: Re: OOPS!! What have I done??? |
|
|
Have you called Van's to see what they say?
| | - The Matronics RV10-List Email Forum - | | | Use the List Feature Navigator to browse the many List utilities available such as the Email Subscriptions page, Archive Search & Download, 7-Day Browse, Chat, FAQ, Photoshare, and much more:
http://www.matronics.com/Navigator?RV10-List |
|
_________________
40936
RV-10 SB N801VR Flying
780 Hours
SuperSTOL 60 hours |
|
| Back to top |
|
|
tsts4
Joined: 06 Aug 2007
Posts: 167
Location: Tampa, FL
|
| Posted: Thu Jan 07, 2010 12:26 pm Post subject: Re: OOPS!! What have I done??? |
|
|
Yep, call Van's. However, my guess is you'll be OK. I think the fix would be something along the lines of stop drilling the "cut" and the filing it smooth, possibly to the point of making a notch similar to what we all did back on the tailcone longerons. But don't do anything until talking to Van's.
| | - The Matronics RV10-List Email Forum - | | | Use the List Feature Navigator to browse the many List utilities available such as the Email Subscriptions page, Archive Search & Download, 7-Day Browse, Chat, FAQ, Photoshare, and much more:
http://www.matronics.com/Navigator?RV10-List |
|
_________________
Todd Stovall
aka "Auburntsts" on EAA and VAF
RV-10 N728TT -- Flying |
|
| Back to top |
|
|
indigoonlatigo(at)msn.com
Guest
|
| Posted: Thu Jan 07, 2010 3:50 pm Post subject: OOPS!! What have I done??? |
|
|
Now that you have polished it up C you could either prime it or better C put a gob of proseal or other flexible bonding medium between the skin and the spar flange when riveting. This will be your corrosion inhibitor. The spar is not alodined C it is anodized. Two different processes.


 There is no way the skin with the rivet holes in their locations would impart enought strain into that flange to start a tear in the spar flange.Basically C that flange is a tie in point for the skin just like Vans said C the spar is a stout piece of metal and it would need to twist so much before the that crack started that if it did C the wing skins would look like a stepped on aluminum can and the plane would have already hit the ground.


 Remember aluminum planes flew with bullet holes in them.


 Great to be safe but this look like a very small BOO BOo. Ease your mind.


 John G


 Do Not Archive


  From: william(at)gbta.net

To: rv10-list(at)matronics.com

Subject: RV10-List: OOPS!! What have I done???

Date: Thu C 7 Jan 2010 12:55:25 -0600


    I think I might have messed up pretty good this time.  Working on the wings on pages 14-5 or 14-6 we are to rivet the forward most hole on the flanges of the inboard most 7 W-1011 L CR ribs.  While doing this I had a less than acceptable rivet so I drilled it out.  When removing the shop head (via punch/small mallet) I managed to push the rib flange away from the spar flange a little.  So C this is where I hopefully learn my lesson C I tape the jaws of a pliers up to prevent scratching the spar/rib.  I easily squeeze the pliers on the flange and it nicely pulls it back into place.  However C I realize when I 'm done that the "cutters" on the pliers nipped the edge of the spar flange.  Left a nice little "cut" on the edge of the spar flange (top flange--didn't count exactly where it was but outboard about 6 or 7 ribs from the inboard most rib).  Lesson here--don't use pliers on aluminum--I know now.  Question--pics are attached--before I contact Vans does anybody have any suggestions/advice.  Did I ruin the wing spar??  Do I leave it alone?  Do I file it smooth and leave it?  Do I use a scotchbrite wheel and remove a smooth "notch" section to get rid of it?  The "nip" is somewhere between 1/16 and 1/8 inch long.


 Any suggestions appreciated other than telling me how stupid I am for doing it.  I have learned my lesson.


 Thanks in advance C

 Bill

 		 	   		    [quote][b]
| | - The Matronics RV10-List Email Forum - | | | Use the List Feature Navigator to browse the many List utilities available such as the Email Subscriptions page, Archive Search & Download, 7-Day Browse, Chat, FAQ, Photoshare, and much more:
http://www.matronics.com/Navigator?RV10-List |
|
|
|
| Back to top |
|
|
stein(at)steinair.com
Guest
|
| Posted: Thu Jan 07, 2010 8:00 pm Post subject: OOPS!! What have I done??? |
|
|
Hi Bill,


I can’t comment too much on the fixing, but I can give another “lesson learned” to your issue.  I don’t know what Van’s is going to say.  Worse case is you put a doubler on it and go about your day but I’m guessing you won’t need to do that.


Anyway, Next time when removing the rivet from an area like (and there will be a next time) that put the corner/edge of a bucking bar beside the rivet tail that you’re going to knock out.  Many times with thin pieces of aluminum like that, the rivet will have grown in the hole on both sides of it, so simply punching it out without backing will result in deformed metal – as you’ve seen.  Placing a bucking bar or other heavy piece of metal beside the rivet tail when driving it out makes it both easier, cleaner and stops deformation.


My 2 cents as usual.


Cheers,

Stein


Stein Bruch


From: owner-rv10-list-server(at)matronics.com [mailto:owner-rv10-list-server(at)matronics.com] On Behalf Of Bill and Tami Britton

 Sent: Thursday, January 07, 2010 12:55 PM

 To: rv10-list(at)matronics.com

 Subject: OOPS!! What have I done???


I think I might have messed up pretty good this time.  Working on the wings on pages 14-5 or 14-6 we are to rivet the forward most hole on the flanges of the inboard most 7 W-1011 L,R ribs.  While doing this I had a less than acceptable rivet so I drilled it out.  When removing the shop head (via punch/small mallet) I managed to push the rib flange away from the spar flange a little.  So, this is where I hopefully learn my lesson, I tape the jaws of a pliers up to prevent scratching the spar/rib.  I easily squeeze the pliers on the flange and it nicely pulls it back into place.  However, I realize when I 'm done that the "cutters" on the pliers nipped the edge of the spar flange.  Left a nice little "cut" on the edge of the spar flange (top flange--didn't count exactly where it was but outboard about 6 or 7 ribs from the inboard most rib).  Lesson here--don't use pliers on aluminum--I know now.  Question--pics are attached--before I contact Vans does anybody have any suggestions/advice.  Did I ruin the wing spar??  Do I leave it alone?  Do I file it smooth and leave it?  Do I use a scotchbrite wheel and remove a smooth "notch" section to get rid of it?  The "nip" is somewhere between 1/16 and 1/8 inch long.


Any suggestions appreciated other than telling me how stupid I am for doing it.  I have learned my lesson.


Thanks in advance,


Bill


       [quote][b]
| | - The Matronics RV10-List Email Forum - | | | Use the List Feature Navigator to browse the many List utilities available such as the Email Subscriptions page, Archive Search & Download, 7-Day Browse, Chat, FAQ, Photoshare, and much more:
http://www.matronics.com/Navigator?RV10-List |
|
|
|
| Back to top |
|
|
MauleDriver(at)nc.rr.com
Guest
|
| Posted: Thu Jan 07, 2010 8:41 pm Post subject: OOPS!! What have I done??? |
|
|
Thanks for that!
A different Bill
do not archive
Stein Bruch wrote:
| Quote: |
Hi Bill,
I cant comment too much on the fixing, but I can give another lesson
learned to your issue. I dont know what Vans is going to say. Worse
case is you put a doubler on it and go about your day but Im guessing
you wont need to do that.
Anyway, Next time when removing the rivet from an area like (and there
will be a next time) that put the corner/edge of a bucking bar beside
the rivet tail that youre going to knock out. Many times with thin
pieces of aluminum like that, the rivet will have grown in the hole on
both sides of it, so simply punching it out without backing will
result in deformed metal as youve seen. Placing a bucking bar or
other heavy piece of metal beside the rivet tail when driving it out
makes it both easier, cleaner and stops deformation.
My 2 cents as usual.
Cheers,
Stein
Stein Bruch
*From:* owner-rv10-list-server(at)matronics.com
[mailto:owner-rv10-list-server(at)matronics.com] *On Behalf Of *Bill and
Tami Britton
*Sent:* Thursday, January 07, 2010 12:55 PM
*To:* rv10-list(at)matronics.com
*Subject:* OOPS!! What have I done???
I think I might have messed up pretty good this time. Working on the
wings on pages 14-5 or 14-6 we are to rivet the forward most hole on
the flanges of the inboard most 7 W-1011 L,R ribs. While doing this I
had a less than acceptable rivet so I drilled it out. When removing
the shop head (via punch/small mallet) I managed to push the rib
flange away from the spar flange a little. So, this is where I
hopefully learn my lesson, I tape the jaws of a pliers up to prevent
scratching the spar/rib. I easily squeeze the pliers on the flange and
it nicely pulls it back into place. However, I realize when I 'm done
that the "cutters" on the pliers nipped the edge of the spar flange.
Left a nice little "cut" on the edge of the spar flange (top
flange--didn't count exactly where it was but outboard about 6 or 7
ribs from the inboard most rib). Lesson here--don't use pliers on
aluminum--I know now. Question--pics are attached--before I contact
Vans does anybody have any suggestions/advice. Did I ruin the wing
spar?? Do I leave it alone? Do I file it smooth and leave it? Do I use
a scotchbrite wheel and remove a smooth "notch" section to get rid of
it? The "nip" is somewhere between 1/16 and 1/8 inch long.
Any suggestions appreciated other than telling me how stupid I am for
doing it. I have learned my lesson.
Thanks in advance,
Bill
*
*
|
| | - The Matronics RV10-List Email Forum - | | | Use the List Feature Navigator to browse the many List utilities available such as the Email Subscriptions page, Archive Search & Download, 7-Day Browse, Chat, FAQ, Photoshare, and much more:
http://www.matronics.com/Navigator?RV10-List |
|
|
|
| Back to top |
|
|
ronrvbuilder(at)bigpond.c
Guest
|
| Posted: Thu Jan 07, 2010 9:33 pm Post subject: OOPS!! What have I done??? |
|
|
Another trick I have used in the past is to use a slice of eraser (or a rubber grommet) over the top of the rivet. The rivet squeezer compresses the rubber against the flange to create a flush joint and then squeezes the rivet. Can post pics if interested.
Cheers,
Ron
VH-XRM, flying in Oz
From: owner-rv10-list-server(at)matronics.com [mailto:owner-rv10-list-server(at)matronics.com] On Behalf Of Stein Bruch
Sent: Friday, 8 January 2010 11:20 AM
To: rv10-list(at)matronics.com
Subject: RE: OOPS!! What have I done???
Hi Bill,
I can’t comment too much on the fixing, but I can give another “lesson learned” to your issue. I don’t know what Van’s is going to say. Worse case is you put a doubler on it and go about your day but I’m guessing you won’t need to do that.
Anyway, Next time when removing the rivet from an area like (and there will be a next time) that put the corner/edge of a bucking bar beside the rivet tail that you’re going to knock out. Many times with thin pieces of aluminum like that, the rivet will have grown in the hole on both sides of it, so simply punching it out without backing will result in deformed metal – as you’ve seen. Placing a bucking bar or other heavy piece of metal beside the rivet tail when driving it out makes it both easier, cleaner and stops deformation.
My 2 cents as usual.
Cheers,
Stein
Stein Bruch
From: owner-rv10-list-server(at)matronics.com [mailto:owner-rv10-list-server(at)matronics.com] On Behalf Of Bill and Tami Britton
Sent: Thursday, January 07, 2010 12:55 PM
To: rv10-list(at)matronics.com
Subject: OOPS!! What have I done???
I think I might have messed up pretty good this time. Working on the wings on pages 14-5 or 14-6 we are to rivet the forward most hole on the flanges of the inboard most 7 W-1011 L,R ribs. While doing this I had a less than acceptable rivet so I drilled it out. When removing the shop head (via punch/small mallet) I managed to push the rib flange away from the spar flange a little. So, this is where I hopefully learn my lesson, I tape the jaws of a pliers up to prevent scratching the spar/rib. I easily squeeze the pliers on the flange and it nicely pulls it back into place. However, I realize when I 'm done that the "cutters" on the pliers nipped the edge of the spar flange. Left a nice little "cut" on the edge of the spar flange (top flange--didn't count exactly where it was but outboard about 6 or 7 ribs from the inboard most rib). Lesson here--don't use pliers on aluminum--I know now. Question--pics are attached--before I contact Vans does anybody have any suggestions/advice. Did I ruin the wing spar?? Do I leave it alone? Do I file it smooth and leave it? Do I use a scotchbrite wheel and remove a smooth "notch" section to get rid of it? The "nip" is somewhere between 1/16 and 1/8 inch long.
Any suggestions appreciated other than telling me how stupid I am for doing it. I have learned my lesson.
Thanks in advance,
Bill
| Quote: | | http://www.matronics.com/Navigator?RV10-List |
0123456789
[quote][b]
| | - The Matronics RV10-List Email Forum - | | | Use the List Feature Navigator to browse the many List utilities available such as the Email Subscriptions page, Archive Search & Download, 7-Day Browse, Chat, FAQ, Photoshare, and much more:
http://www.matronics.com/Navigator?RV10-List |
|
|
|
| Back to top |
|
|
MauleDriver(at)nc.rr.com
Guest
|
| Posted: Fri Jan 08, 2010 5:50 am Post subject: OOPS!! What have I done??? |
|
|
That's a good one. Thanks for that!
The very first trick I learned from Jacob at the Alexander Build Center
for that situation was to use the point of the pick to hold a piece
tightly against another piece while squeezing. You can usually do that
single handed when power squeezing. That's >|| and squeeze.
Bill "kind of wishing he was still doing a lot of riveting" Watson
Ron McGann wrote:
| Quote: |
Another trick I have used in the past is to use a slice of eraser (or
a rubber grommet) over the top of the rivet. The rivet squeezer
compresses the rubber against the flange to create a flush joint and
then squeezes the rivet. Can post pics if interested.
Cheers,
Ron
VH-XRM, flying in Oz
------------------------------------------------------------------------
*From:* owner-rv10-list-server(at)matronics.com
[mailto:owner-rv10-list-server(at)matronics.com] *On Behalf Of *Stein Bruch
*Sent:* Friday, 8 January 2010 11:20 AM
*To:* rv10-list(at)matronics.com
*Subject:* RE: OOPS!! What have I done???
Hi Bill,
I cant comment too much on the fixing, but I can give another lesson
learned to your issue. I dont know what Vans is going to say. Worse
case is you put a doubler on it and go about your day but Im guessing
you wont need to do that.
Anyway, Next time when removing the rivet from an area like (and there
will be a next time) that put the corner/edge of a bucking bar beside
the rivet tail that youre going to knock out. Many times with thin
pieces of aluminum like that, the rivet will have grown in the hole on
both sides of it, so simply punching it out without backing will
result in deformed metal as youve seen. Placing a bucking bar or
other heavy piece of metal beside the rivet tail when driving it out
makes it both easier, cleaner and stops deformation.
My 2 cents as usual.
Cheers,
Stein
Stein Bruch
*From:* owner-rv10-list-server(at)matronics.com
[mailto:owner-rv10-list-server(at)matronics.com] *On Behalf Of *Bill and
Tami Britton
*Sent:* Thursday, January 07, 2010 12:55 PM
*To:* rv10-list(at)matronics.com
*Subject:* OOPS!! What have I done???
I think I might have messed up pretty good this time. Working on the
wings on pages 14-5 or 14-6 we are to rivet the forward most hole on
the flanges of the inboard most 7 W-1011 L,R ribs. While doing this I
had a less than acceptable rivet so I drilled it out. When removing
the shop head (via punch/small mallet) I managed to push the rib
flange away from the spar flange a little. So, this is where I
hopefully learn my lesson, I tape the jaws of a pliers up to prevent
scratching the spar/rib. I easily squeeze the pliers on the flange and
it nicely pulls it back into place. However, I realize when I 'm done
that the "cutters" on the pliers nipped the edge of the spar flange.
Left a nice little "cut" on the edge of the spar flange (top
flange--didn't count exactly where it was but outboard about 6 or 7
ribs from the inboard most rib). Lesson here--don't use pliers on
aluminum--I know now. Question--pics are attached--before I contact
Vans does anybody have any suggestions/advice. Did I ruin the wing
spar?? Do I leave it alone? Do I file it smooth and leave it? Do I use
a scotchbrite wheel and remove a smooth "notch" section to get rid of
it? The "nip" is somewhere between 1/16 and 1/8 inch long.
Any suggestions appreciated other than telling me how stupid I am for
doing it. I have learned my lesson.
Thanks in advance,
Bill
* *
* *
**
**
**
*http://www.matronics.com/Navigator?RV10-List*
**
**
*http://forums.matronics.com*
**
**
*http://www.matronics.com/contribution*
* *
*
*
|
| | - The Matronics RV10-List Email Forum - | | | Use the List Feature Navigator to browse the many List utilities available such as the Email Subscriptions page, Archive Search & Download, 7-Day Browse, Chat, FAQ, Photoshare, and much more:
http://www.matronics.com/Navigator?RV10-List |
|
|
|
| Back to top |
|
|
william(at)gbta.net
Guest
|
| Posted: Fri Jan 08, 2010 7:49 am Post subject: OOPS!! What have I done??? |
|
|
Thanks to everyone for the information. As I stated earlier, Scott at Vans
said it wasn't a huge deal. He said to grind or file the area back smooth.
Make sure all the "cut" is gone, smooth it out and move on. I have that
done and need to prime over the exposed aluminum and it will be history.
Thanks for the tips on holding the flanges in place while riveting.
Just yesterday I found what I think is a better way to remove drilled out
rivets. After you get the head drilled out and popped off I used a spring
loaded center punch on the rivet tail to knock it out of the hole. It
provides a more concentrated "blow" on the rivet than a standard
punch/hammer method and I can hold the flange in place while doing this to
prevent metal deformation. Generally it removed the rivet tail in the first
blow.
Thanks again,
Bill
--------------------------------------------------
From: "Bill Mauledriver Watson" <MauleDriver(at)nc.rr.com>
Sent: Friday, January 08, 2010 7:49 AM
To: <rv10-list(at)matronics.com>
Subject: Re: OOPS!! What have I done???
| Quote: |
<MauleDriver(at)nc.rr.com>
That's a good one. Thanks for that!
The very first trick I learned from Jacob at the Alexander Build Center
for that situation was to use the point of the pick to hold a piece
tightly against another piece while squeezing. You can usually do that
single handed when power squeezing. That's >|| and squeeze.
Bill "kind of wishing he was still doing a lot of riveting" Watson
Ron McGann wrote:
>
> Another trick I have used in the past is to use a slice of eraser (or a
> rubber grommet) over the top of the rivet. The rivet squeezer compresses
> the rubber against the flange to create a flush joint and then squeezes
> the rivet. Can post pics if interested.
>
> Cheers,
>
> Ron
>
> VH-XRM, flying in Oz
>
> ------------------------------------------------------------------------
>
> *From:* owner-rv10-list-server(at)matronics.com
> [mailto:owner-rv10-list-server(at)matronics.com] *On Behalf Of *Stein Bruch
> *Sent:* Friday, 8 January 2010 11:20 AM
> *To:* rv10-list(at)matronics.com
> *Subject:* RE: OOPS!! What have I done???
>
> Hi Bill,
>
> I cant comment too much on the fixing, but I can give another lesson
> learned to your issue. I dont know what Vans is going to say. Worse
> case is you put a doubler on it and go about your day but Im guessing
> you wont need to do that.
>
> Anyway, Next time when removing the rivet from an area like (and there
> will be a next time) that put the corner/edge of a bucking bar beside the
> rivet tail that youre going to knock out. Many times with thin pieces of
> aluminum like that, the rivet will have grown in the hole on both sides
> of it, so simply punching it out without backing will result in deformed
> metal as youve seen. Placing a bucking bar or other heavy piece of
> metal beside the rivet tail when driving it out makes it both easier,
> cleaner and stops deformation.
>
> My 2 cents as usual.
>
> Cheers,
>
> Stein
>
> Stein Bruch
>
> *From:* owner-rv10-list-server(at)matronics.com
> [mailto:owner-rv10-list-server(at)matronics.com] *On Behalf Of *Bill and
> Tami Britton
> *Sent:* Thursday, January 07, 2010 12:55 PM
> *To:* rv10-list(at)matronics.com
> *Subject:* OOPS!! What have I done???
>
> I think I might have messed up pretty good this time. Working on the
> wings on pages 14-5 or 14-6 we are to rivet the forward most hole on the
> flanges of the inboard most 7 W-1011 L,R ribs. While doing this I had a
> less than acceptable rivet so I drilled it out. When removing the shop
> head (via punch/small mallet) I managed to push the rib flange away from
> the spar flange a little. So, this is where I hopefully learn my lesson,
> I tape the jaws of a pliers up to prevent scratching the spar/rib. I
> easily squeeze the pliers on the flange and it nicely pulls it back into
> place. However, I realize when I 'm done that the "cutters" on the pliers
> nipped the edge of the spar flange. Left a nice little "cut" on the edge
> of the spar flange (top flange--didn't count exactly where it was but
> outboard about 6 or 7 ribs from the inboard most rib). Lesson here--don't
> use pliers on aluminum--I know now. Question--pics are attached--before I
> contact Vans does anybody have any suggestions/advice. Did I ruin the
> wing spar?? Do I leave it alone? Do I file it smooth and leave it? Do I
> use a scotchbrite wheel and remove a smooth "notch" section to get rid of
> it? The "nip" is somewhere between 1/16 and 1/8 inch long.
>
> Any suggestions appreciated other than telling me how stupid I am for
> doing it. I have learned my lesson.
>
> Thanks in advance,
>
> Bill
>
> * *
> * *
> **
> **
> **
> *http://www.matronics.com/Navigator?RV10-List*
> **
> **
> *http://forums.matronics.com*
> **
> **
> *http://www.matronics.com/contribution*
> * *
> *
> *
|
| | - The Matronics RV10-List Email Forum - | | | Use the List Feature Navigator to browse the many List utilities available such as the Email Subscriptions page, Archive Search & Download, 7-Day Browse, Chat, FAQ, Photoshare, and much more:
http://www.matronics.com/Navigator?RV10-List |
|
|
|
| Back to top |
|
|
jchang10
Joined: 05 Jul 2006
Posts: 227
|
| Posted: Fri Jan 08, 2010 8:57 am Post subject: OOPS!! What have I done??? |
|
|
Also, 99.9% of the time, I just drill thru the entire rivet length with

a #43 or #33 drill bit. Then 99% of the time, i get a nice donut hole of

the rivet left. The donut hole weakens the rivets hold, so a pair of

nose pliers can usually take it out easily or a center punch on the

donut ring.


The other 1%, you drill off-center and get a crescent moon or the like

and the yelling really starts!


Jae

40533
| | - The Matronics RV10-List Email Forum - | | | Use the List Feature Navigator to browse the many List utilities available such as the Email Subscriptions page, Archive Search & Download, 7-Day Browse, Chat, FAQ, Photoshare, and much more:
http://www.matronics.com/Navigator?RV10-List |
|
_________________
#40533 RV-10
First flight 10/19/2011
Phase 1 Done 11/26/2011 |
|
| Back to top |
|
|
|
|
You cannot post new topics in this forum
You cannot reply to topics in this forum
You cannot edit your posts in this forum
You cannot delete your posts in this forum
You cannot vote in polls in this forum
You cannot attach files in this forum
You can download files in this forum
|
Powered by phpBB © 2001, 2005 phpBB Group
|

